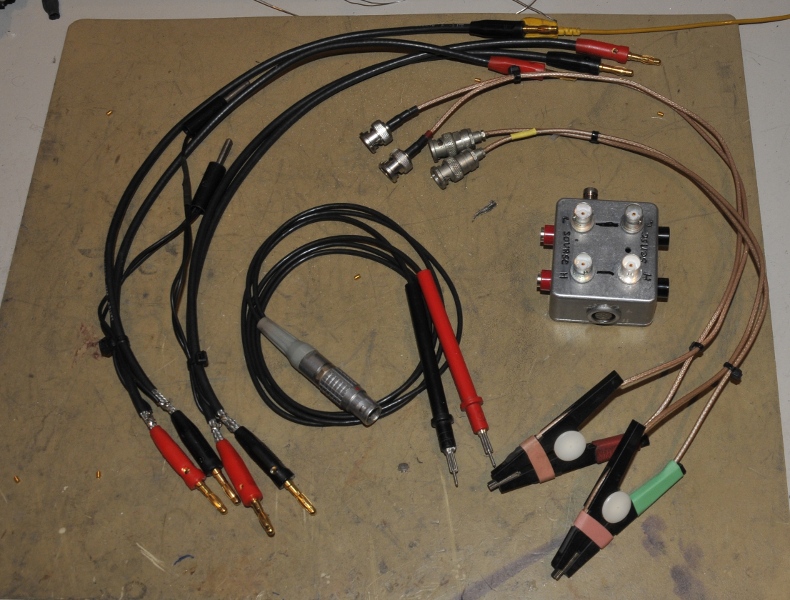
Bench meters often have a 4 wire, or Kelvin, measurement option. Good LCR and ESR meters too (but often they are 5 wire). And bridges use 3 wire. I needed a way to connect my kelvin clamps to all of them and I wanted kelvin probes.
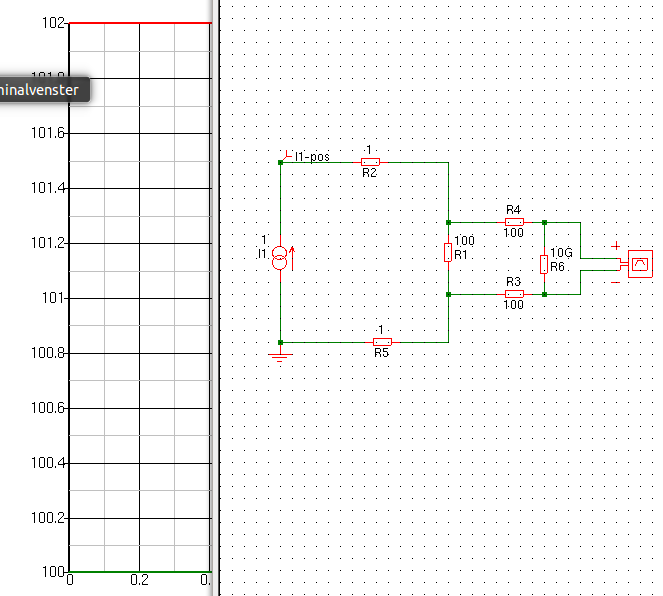
A 4 wire measurent is very easy. A 2 wire Ohm meter sources a current and measures the voltage drop over the resistance you measure. The voltage is measured inside the meter where the current goes through the testleads. So the testleads are in serie with the resistor. This can be < 50 mOhm for good quality cables upto more as 1 Ohm for Chinese crap leads. So If you measure 5 Ohm this can give a rather big error.
A 4 wire measurement uses two wires to source the current and 2 wires to measure voltage direct at the resistor and so eliminating the wire resistance.
Down here you see the effect of 1 Ohm testleads while measuring 100 Ohm. The 4 wire test leads are here absurd, 100 Ohm, but you see this has no influence. The 2 wire methode gives, suprise, suprise, 102 Ohm (100 ohm and 2x the testleads) the 4 wire methode gives 100 Ohm. The two wire gives a 2 % fault, but at 1 Ohm this would give 3Ohm instead of 1 Ohm, a 200 % fault. Even with 0.1 Ohm testleads the fault is 20%.
I had a pair of professional clamp but they wire was not shielded. That made them useless for LCR use or ACR measuremets but also more noise for DC resistance.
These are made from RG179 coax. I allready mentioned 5 wire technic. In that case the shield is carrying a guard signal for even better shielding and because there is no voltage potential between the sensitive sense line and the shield there also is no capacitance. The aluminium box has a guard connection. The banana busses on the side are for connecting the instrument/ The banana wires are RG58/u. The extra wire and banana is to connect it to a guard terminal. For bridge use I use only halve this adapter in 3 wire mode, for my IET I use 5 wire, for the multimeters I use 4 wire.
The result is a multimeter that shows a stable zero Ohm when I connect the clips together . On the side is a lemo connector. The probes are modified and the leads connect just behind the tips. So I have about 1 cm of extra resistance. Good enough for measurements that need less accuracy, or If there is no other way, like trace resistance measurement.
Update june 2016
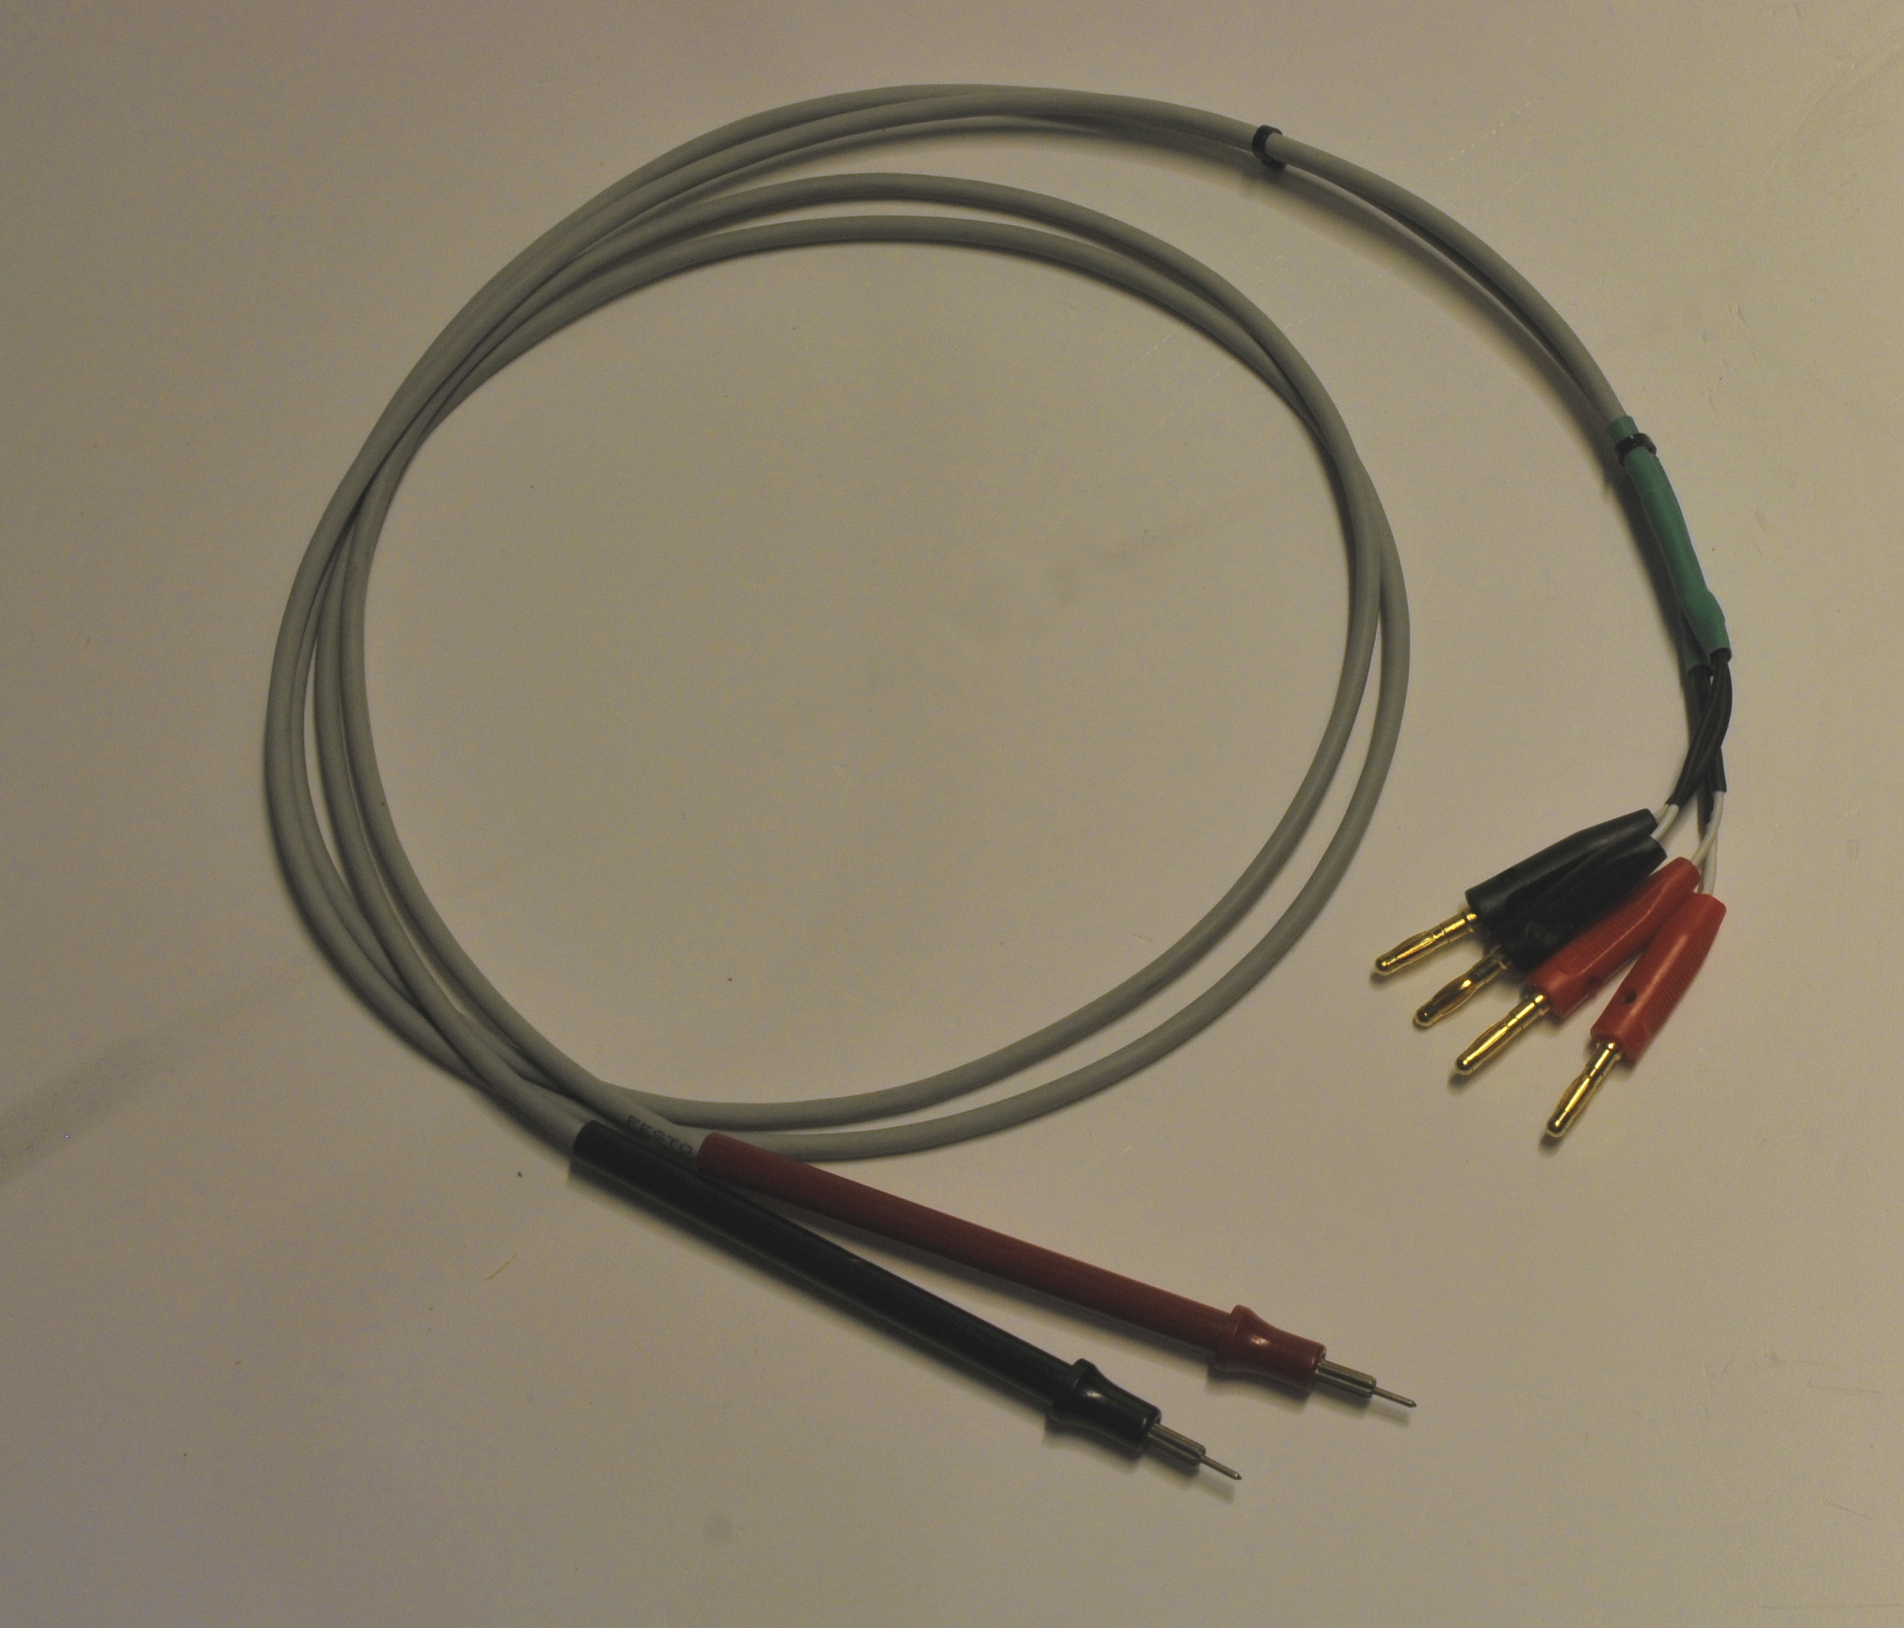
I made an extra pair of (semi) kelvin testleads. They are connected to the rear sockets of my Keithley 2000. It has a knob on the front panel to switch between front and rear sockets. This way I can do 4W resistance measurements without swapping probes. The cables are 3 wire silicon from Festo and normaly used to connect industrial sensors. I got tired from repairing my two sets of silicon DMM wires (Pomona and Agilent) . That stuff is to elastic and always breaks at the straight plug just above the probes. So I made a second pair with banana’s on both ends and the 3 wires soldered together. The cable is a bit thicker and stiffer but still very nice to use and there is more copper inside.
In the kelvin probes I use 2 inner wires for source and 1 for sense. At the probeside they are soldered together. I opened the probe and reduced the length the inner conductor. The wires are soldered as far to the tip as possible. (about 15 mm between tip point and wire) So technical it is not a real Kelvin connection but for your every day measurements it is much better as 2 wire. I used probes that have a combitip. The wider upper part of the tip can be used as a bananajack. In that case the fault becomes very small because there is only a few mm between wires and DUT . The resistance with the tips together is a few mohm. The new Festo “normal” testlead cables I made is just over 0,1 ohm, so very low and very usable. Time will tell how they perform but these cables were spares from a huge wet ski-grinder (6x2x2 meter) That is a very harsh job for cables but I never had to replace a cable, not even the ones that were used on moving parts or were partly submerged.