
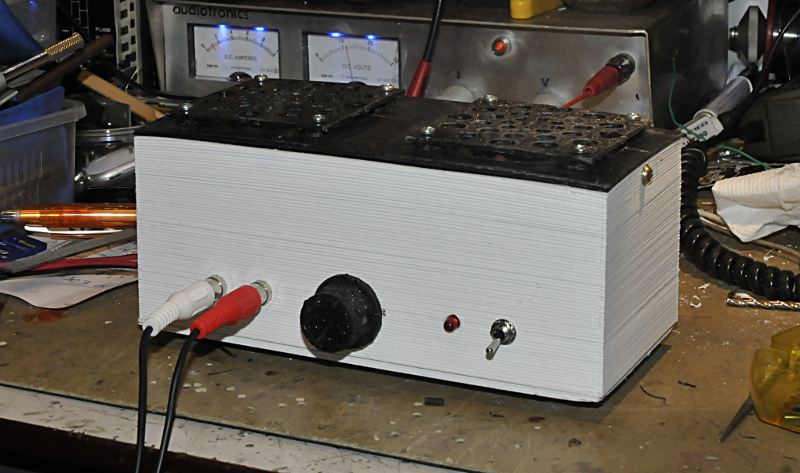
This is a 2x10W amplifier made from a kit we sold at the ham-fest in rosmalen this year. I wanted a small amp for my laptop and this little amp was ideal for my use. It had to be transportable but I do not need battery power. Allthough that would not be a problem.
10W does not seem a lot, but that is because in the audio world they use fantasy parameters. It is f.i. rather useless to spec an amp for 100W if it can do that only for 10 ms before it desintegrates or burst in to flames. So forget Watt-rms and other fancy specs like used to describe the “huge” powers delivered from small cabinets powered by one AA battery. Power in Watt is P=UxI, and U and I, without subscripts like pp, are automatic rms values. So Watt-rms is double up and the rest is useless. (OK, to take it to an other level, as far as I know, never used in audio, there is the complex version of power. Complex power S in VA, is made from P in Watt, the real part and Q, the imaginair part) A bit strange because an amplifier is used to drive a complex load. The coil of the speaker has a DC resistance, but the real part also has some frequency depending factors like skin effect. The coil it selve is the highest impedance part. 8 Ohm is the impedance measured at 1 kHz and when the frequency goes up, the imaginair part of the impedance goes up the most. But enough about that. That will be a good subject to talk about in a seperate page. A nice excuse to do play with measurement gear.
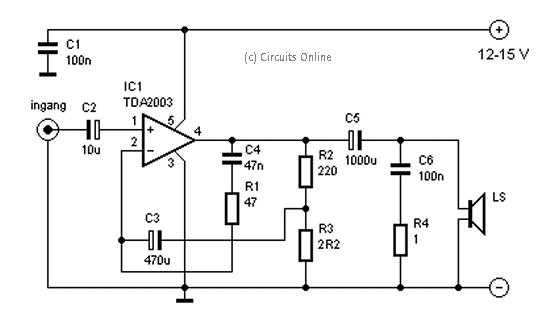
source: Circuits online
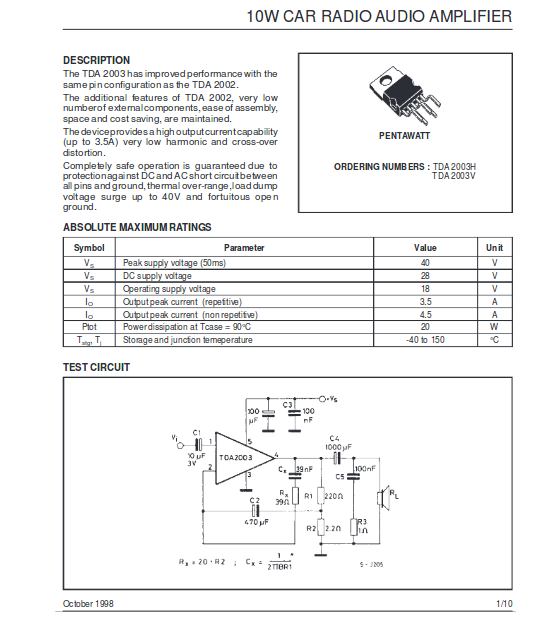
The Datasheet of the heart of the AMP:
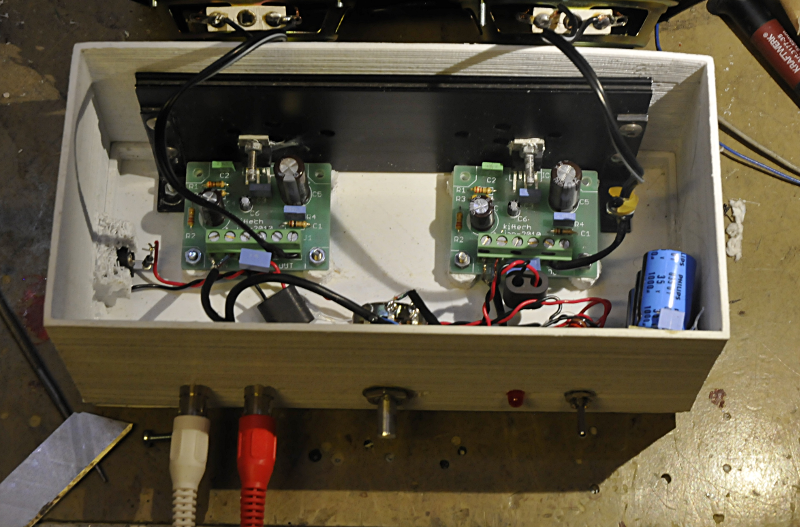
the inside
Very easy to make a nice amplifier with this IC. Use a good powersupply because the noise from the psu is injected straight in the amplifier. I use a adapter from my junkbox that can deliver 2,7A at 16V. In the cabinet I added 3000 uF , a 1uF mkp and a 100 nf mkp. Besides that some ferite beads. The result is a nice low noise amp. I used my psu tester to check it under several load conditions. http://www.pa4tim.nl/?p=4152 for the schematic.
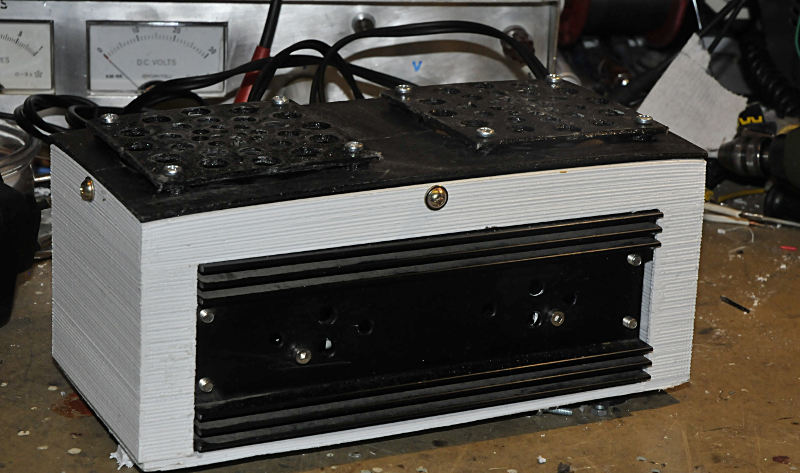
heatsink
A cabinet seemed like a nice test for my 3D printer. http://www.pa4tim.nl/?p=5020 But that thing does not work on brainwaves (yet) so I needed a way to get those brainwaves to Gcode for the printer. I tried several 3D cad programs and that is a whole new world. I ended up using Freecad. this because it is an open source linux program. But after trials with sketchup and 123D design, freecad is a bit intimidating or better, it scared the hell out of me.
But Freecad has a very helpfull community. Besides many youtube tutorials, a wiki and much more helpfull things, You do not have to searce because the start page of the program itself has all the links. But the best experience for me was the Freecad forum, they very patient helped me to get my ideas in a usable 3D cad design. More info about Freecad http://www.freecadweb.org/
Here some steps to design for instance a cabinet. First you make a 2D sketch. not everything in one time but is several steps. This makes it very easy to make changes. Freecad then updates and scales everything for you. here you see the 3D solid (the grey area) that was padded from the 2D sketch you see on top of it.
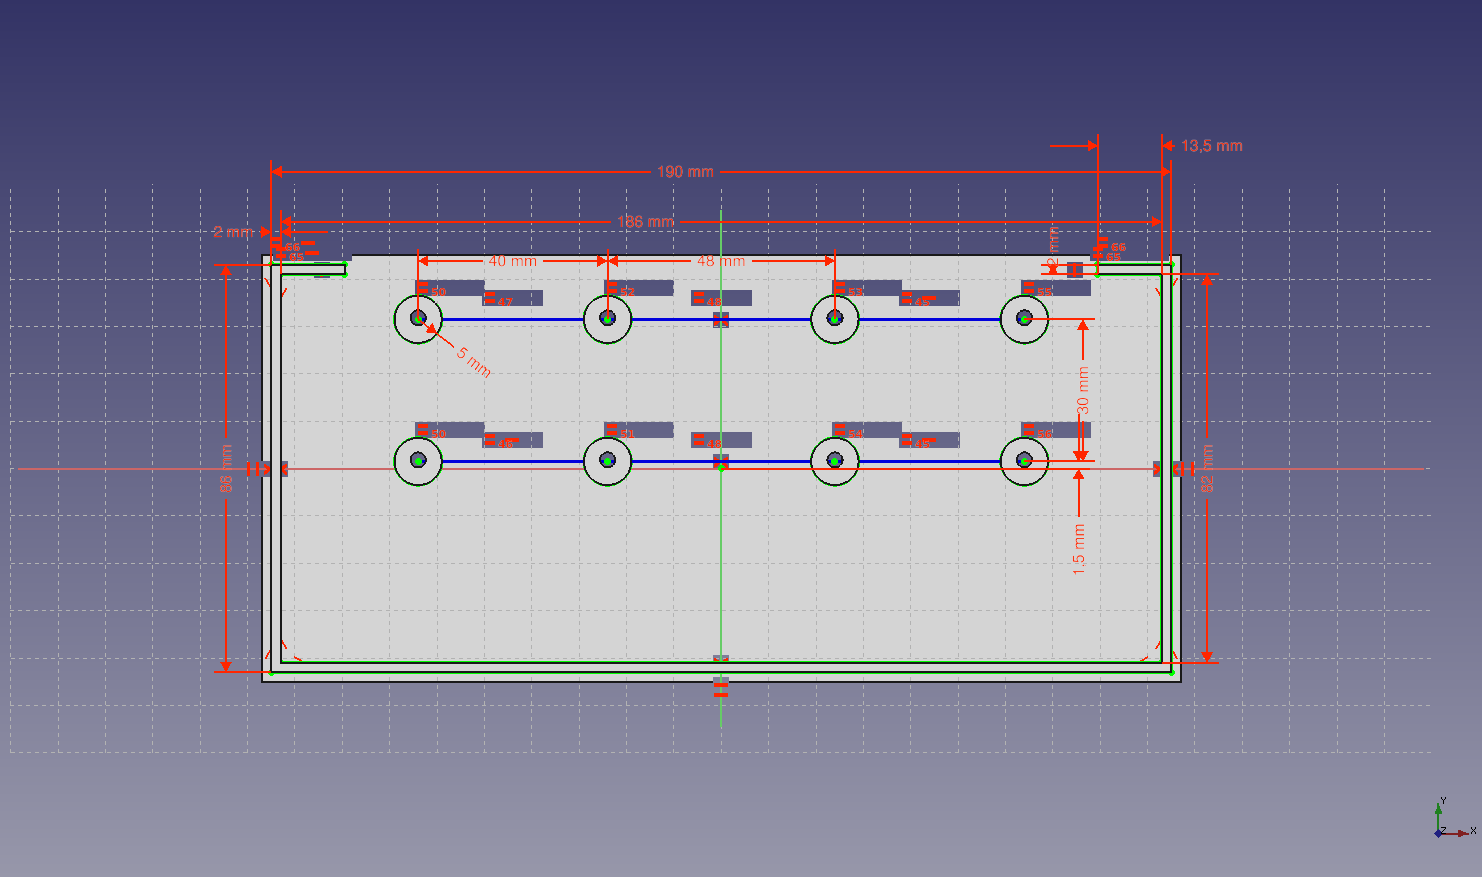
Sketch from bottom
After padding and pocketing you get this 3D result.
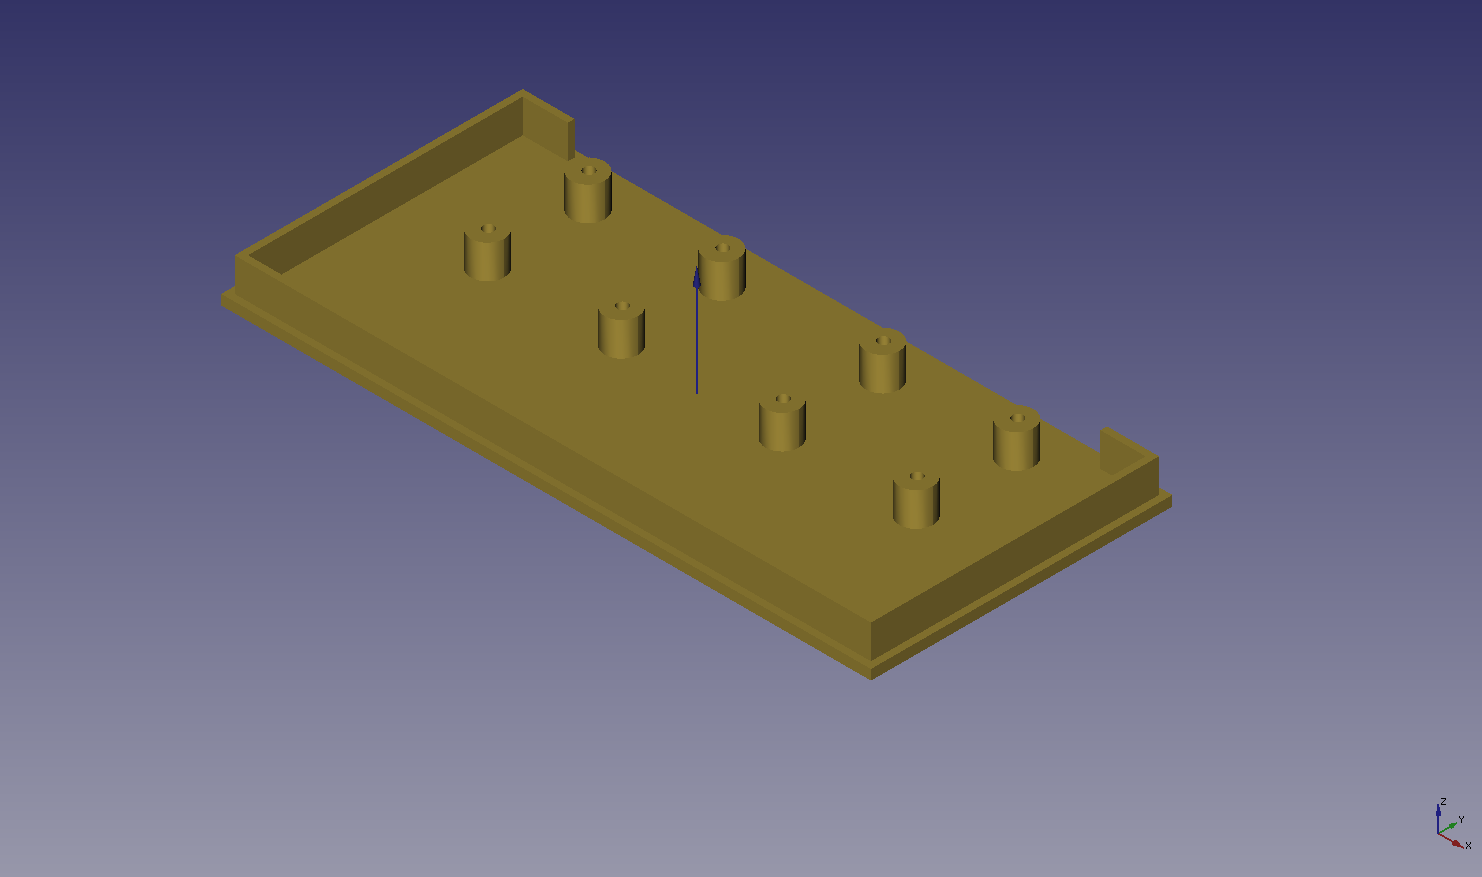
the 3D picture
To get from this to Gcode Freecad also has a mesh workbench that can translate this in many formats. I need the stl format. But freecad also has tools that analyse and repair the model.
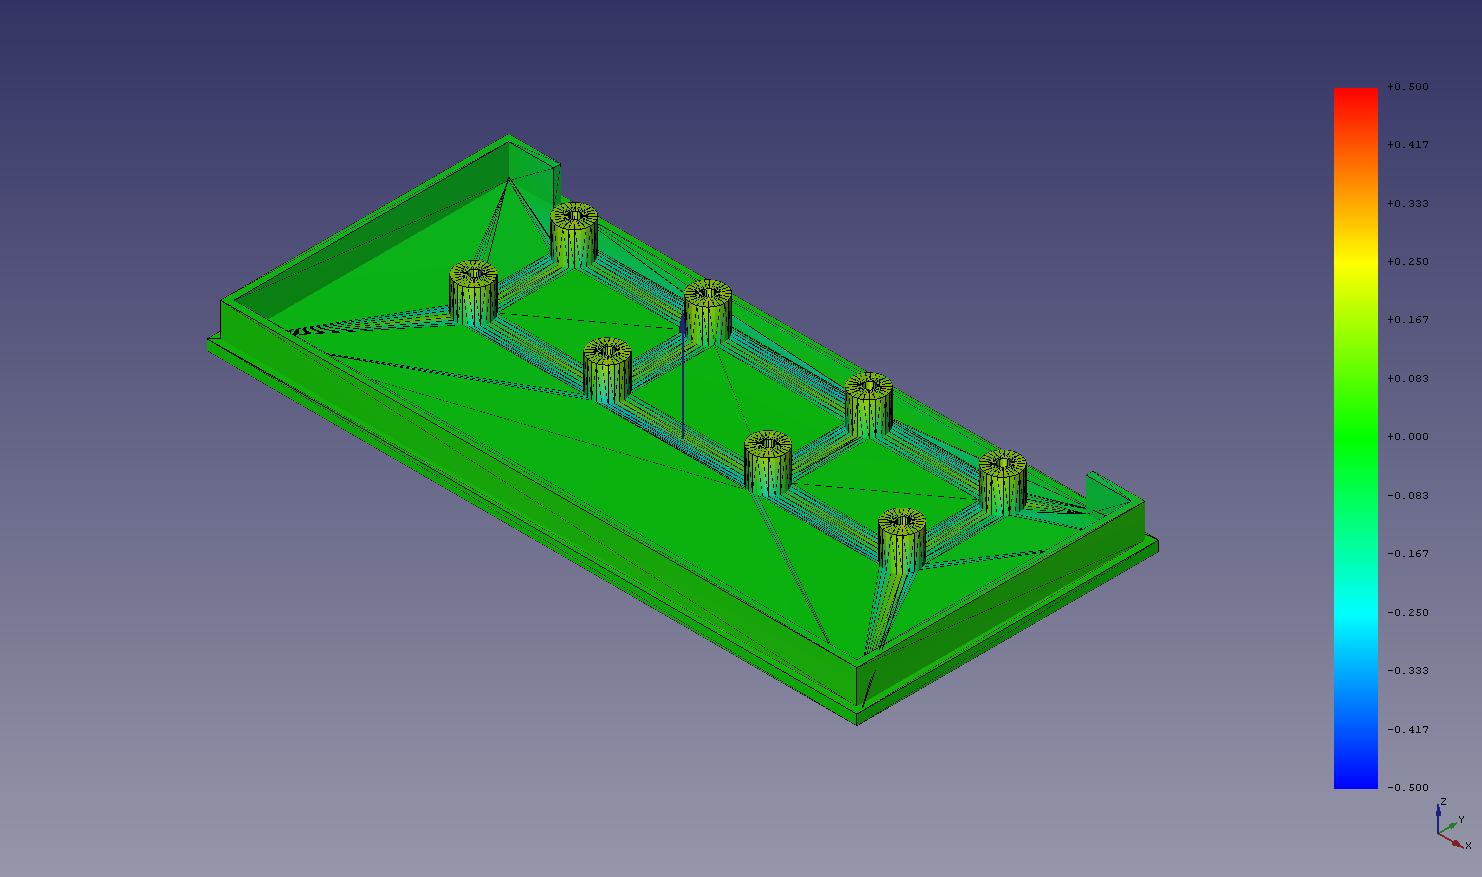
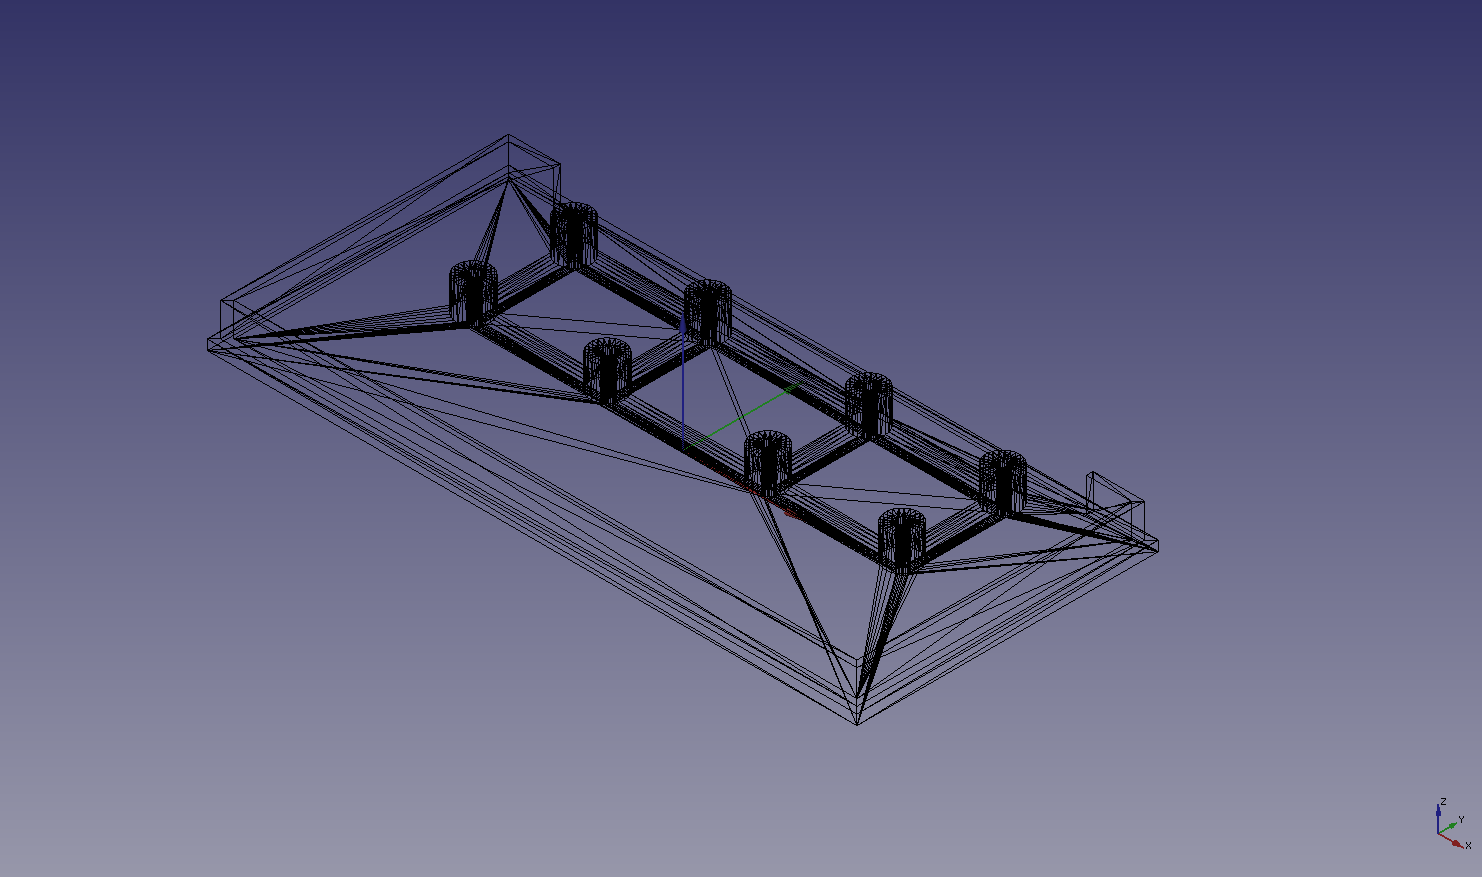
And this is the base, a wireframe that holds the vectors used as base for the 3D printer Gcode.
I then import the stl file in repetier that translates the stl code in Gcode including the parameters for my printer. I use a double screen, Freecad on my “big” screen, the right one is my laptop screen. This is very handy. You can look up things or watch a tutorial on the small screen and draw on the other at the same time. (I use mint linux on this pc)
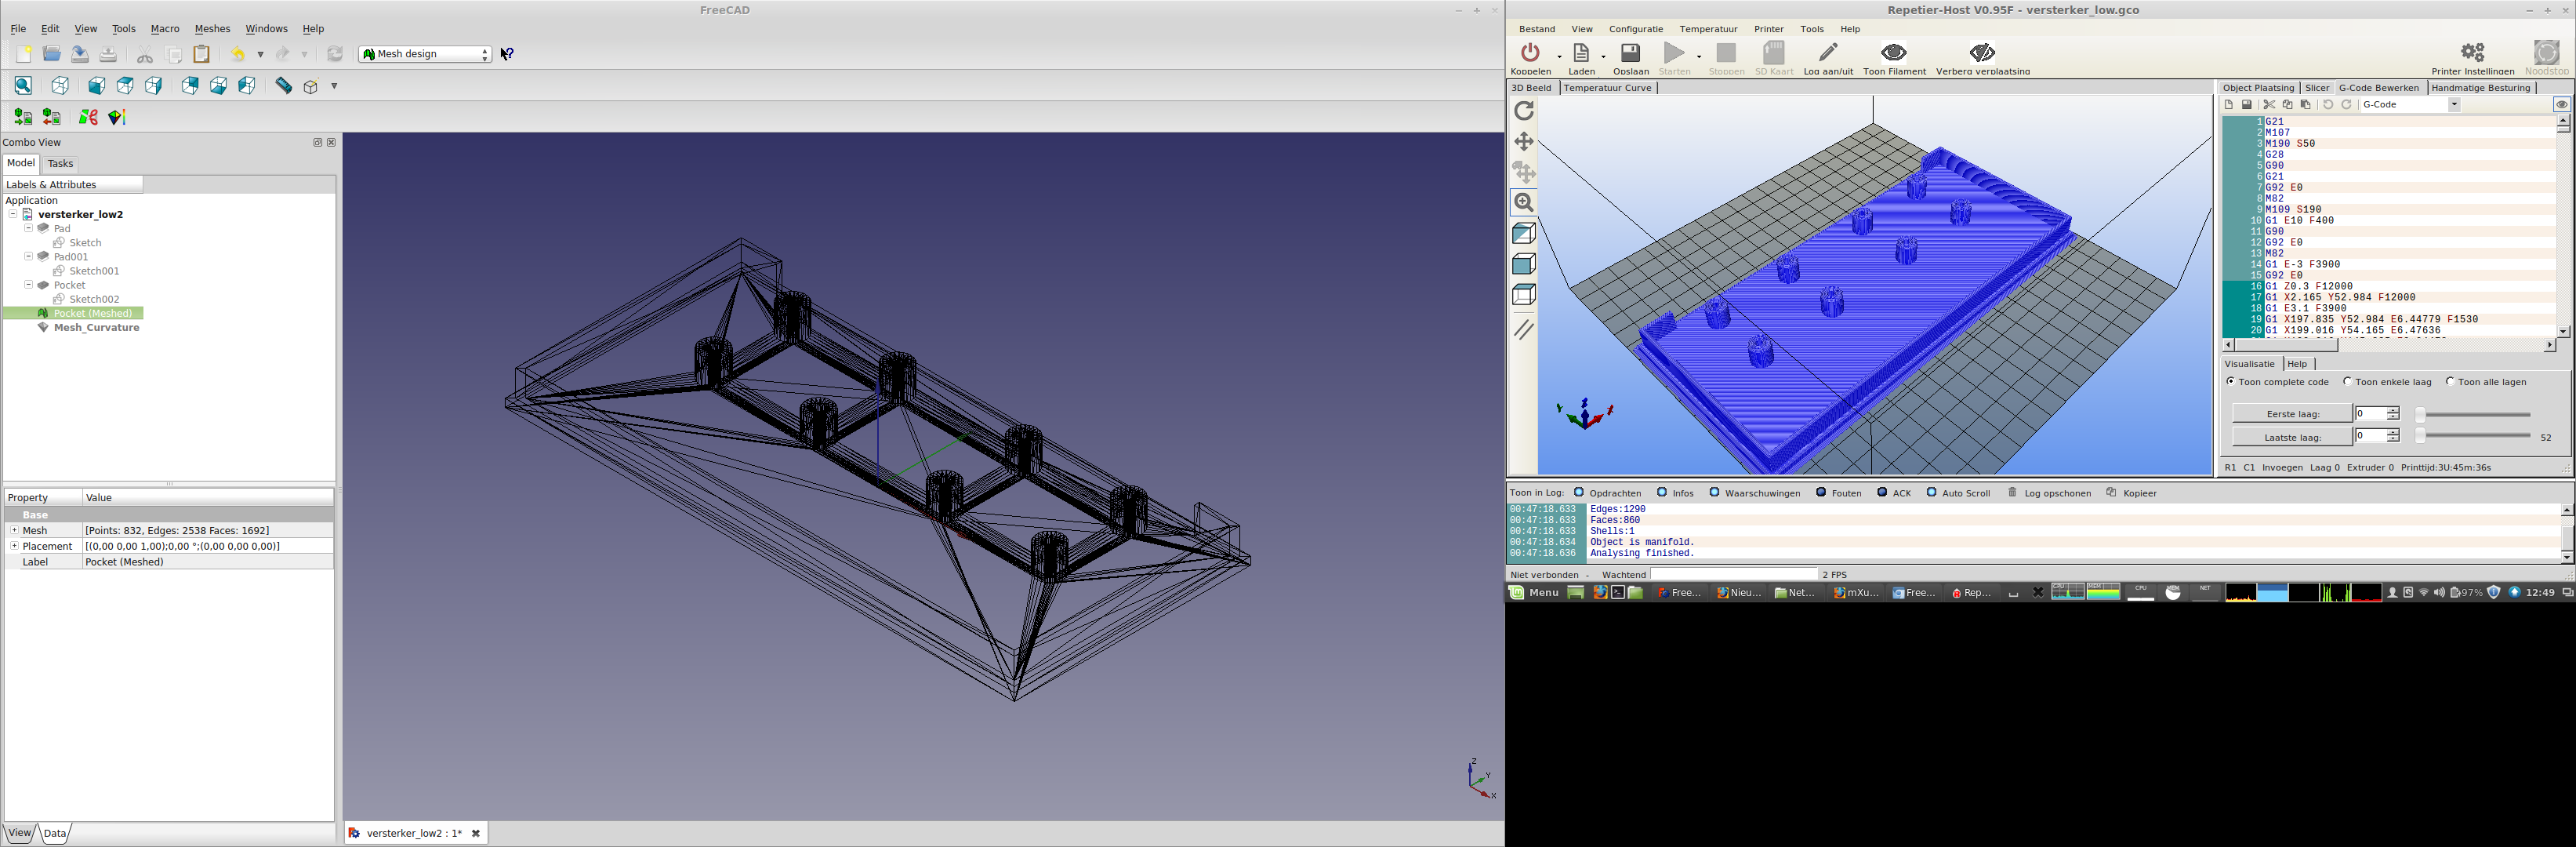
Repetier
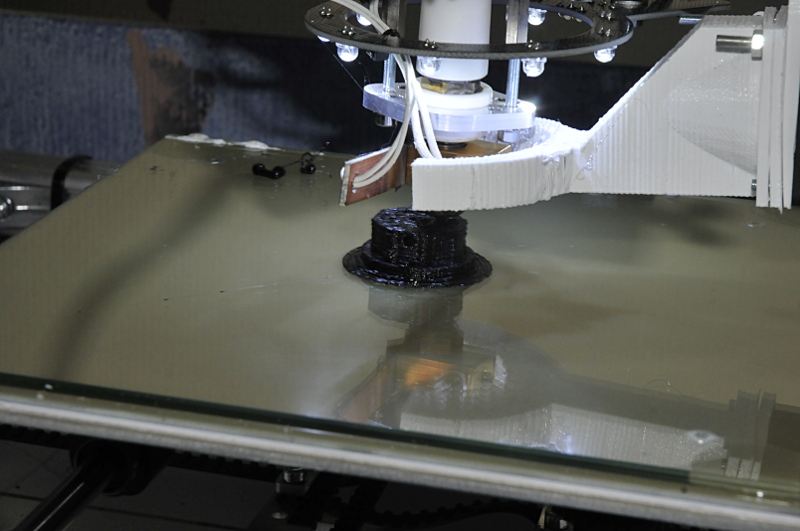
The Printer in action
The knob for the amp